- Side length, from waist to ankle (or required length).
- Waist.
- Seat depth (aka body rise).
- Hips.
- Leg width (meaning the width you want them to be at the lower hem).
Thursday, 21 April 2011
30s / 40s trousers.
A pattern draft from my Nana's old sewing book.
She was given it when she had to give up her tailoring training, by the mother of a friend, 'Mom Hume' (the family took Nana in when her mother died - she was 16). It's not dated, and I've never been able to find any reference to it on the internet, or old book sites, so I'm guessing that it's from the late 30s (from the clothes and hairstyles).
My Nana gave it to me for my 16th birthday, because I loved it. This was the book that I used as a guide when I made my first patterns as a young teenager. In fact, my current winter coat is made from a draft in this book.
Anyway, I've photographed the trouser draft. (Can't use the scanner - never learned how - should sometime!)
So here they are:
The measurements you need to draft the pattern are as follows:
Obviously, this is a block - it doesn't include the waistband (a rectangle the size of your waist), and it doesn't include turnings for fastenings - you have to add those yourself. Assuming they're made side fastening, as per the standard of the time, that's dead easy. To add a fly, pockets, etc, is relatively simple too.
And it can be adapted to all sorts of different styles - but made just as it is, they make up quite nicely.
I wouldn't make them without a toile if it's your first time after drafting the pattern, though.
Wednesday, 20 April 2011
How To's
I've decided that from time to time, I'm going to add the odd basic 'how to' to this blog. Pattern cutting, sewing, whatever.
You know, as in 'how to hand sew a buttonhole', 'how to cut a yoke from a basic pattern', 'how to do a pin hem'. That sort of thing. Assuming I can remember them all! :o)
Don't have one for right now, but declaring the intention! (And will hopefully find time to add the odd bit here and there over the next week or so, all being well and calamities allowing.)
Badges, badges, badges...
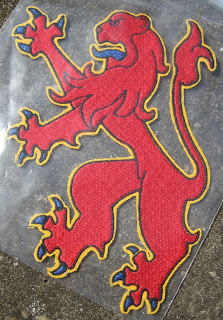
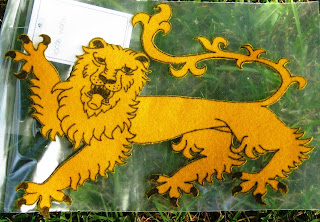
So I spent last weekend (or Sunday afternoon, anyway), taking some decent pictures of livery badges.
All machine embroidered, and all designed and digitised by moi!
A chalice, digitised over a freehand sketch I drew:
A lion rampant, based on the colours of Owain Glyndwr.
A royal (British) leopard (aka lion), taken from an original drawing I did.
And this one, not embroidered, but cut from pure (Hainsworth's) wool, with the detail painted on, and done from an earlier (less detailed) version of the sketch used for the above embroidered badge:
And when loading the pictures, it occurred to me that I had more pictures that I never shared.
So first, some later (not medieval) badges I did a while back. The client provided me with a picture,
from which I made a working sketch,
from which (in turn) I digitised the image for machine embroidery.
And this is the finished result (after several try-outs, much tweaking, adding and removing outlines, and playing with stitching orders, and a proof):
And a closer one showing the detail:
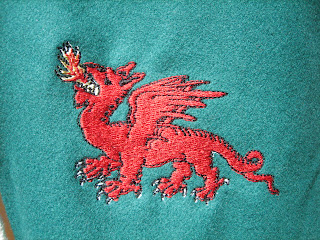
And a Tudor dragon, embroidered directly onto a Tudor livery coat I made:
Subscribe to:
Comments (Atom)


